Getting started
Prerequisites
Note
The Maven Repository is only accessible within the DFKI network. If you work remotely, make sure that your VPN client is activated.
Make sure that the following applications are installed:
- JAVA (at least version 11)
- Maven (at least version 3.6)
- JAVA IDE with Maven support (e.g. IntelliJ IDEA, which is used in this manual)
You can check the versions by executing the following commands in your terminal
java --version
mvn --version
Creating a Maven Project
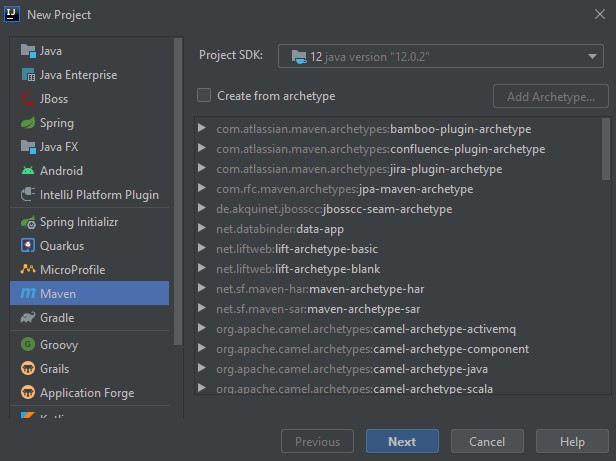
First, you need to create an empty Maven project in your IDE. To do so, click File -> New -> Project

Select Maven and a JAVA version greater 11.
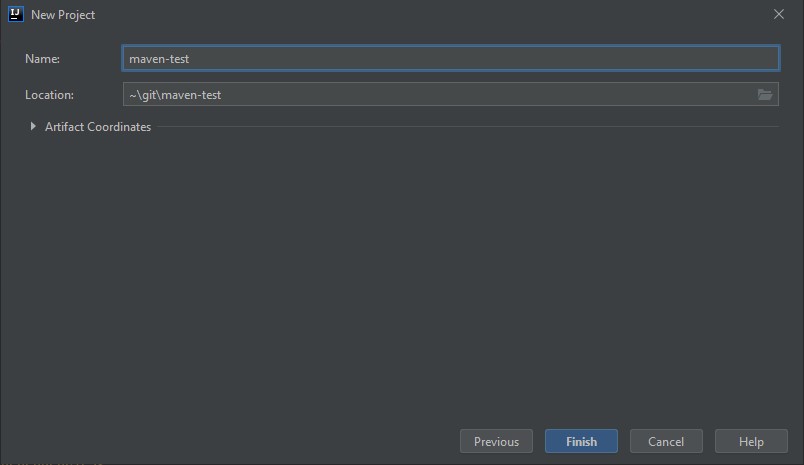
Give the project an appropriate name and select the Location.
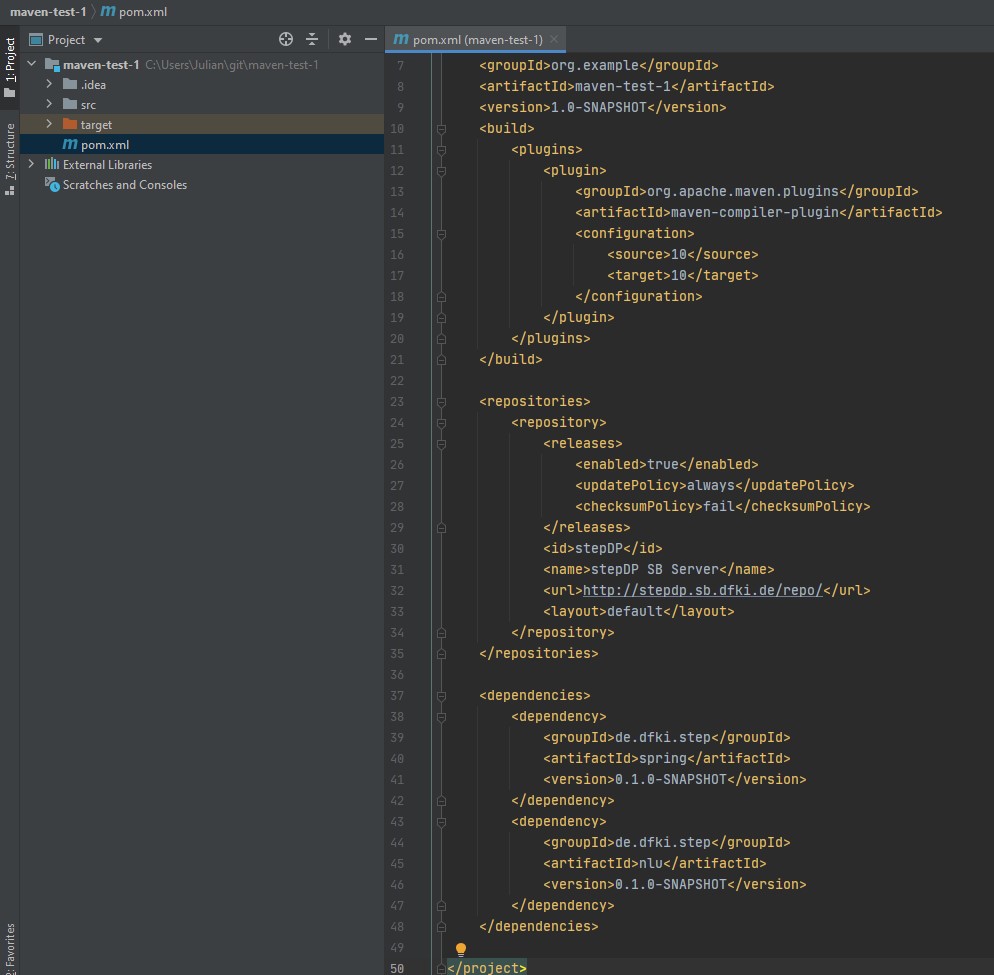
After the project is created, add the following line to the pom.xml to be able to use stepDP.
First these lines, so that the required JAVA features of the newer JAVA version can be used:
<build>
    <pluginManagement>
        <plugins>
            <plugin>
                <groupId>org.apache.maven.plugins</groupId>
                <artifactId>maven-compiler-plugin</artifactId>
                <version>3.8.1</version>
                <configuration>
                    <source>10</source>
                    <target>10</target>
                </configuration>
            </plugin>
        </plugins>
    </pluginManagement>
</build>
Then we add the stepDP repository:
<repositories>
    <repository>
        <releases>
            <enabled>true</enabled>
            <updatePolicy>always</updatePolicy>
            <checksumPolicy>fail</checksumPolicy>
        </releases>
        <id>stepDP</id>
        <name>stepDP SB Server</name>
        <url>http://stepdp.sb.dfki.de/repo/</url>
        <layout>default</layout>
    </repository>
</repositories>
only http is working
Since we use DFKI's internal hosting, only an http connection is possible. A connection via https is currently not possible. Since all traffic is only carried over the DFKI internal network, this does not cause any security problems.
And finally, we add stepDP as a dependency:
<dependencies>
    <dependency>
        <groupId>de.dfki.step</groupId>
        <artifactId>spring</artifactId>
        <version>0.1.0-SNAPSHOT</version>
    </dependency>
</dependencies>
Why spring and not core?
stepDP consists of various modules. The most important module is core. A further, no less important module, however, is the web interface for communicating with stepDP. This module is called spring (because it is based on the Spring Framework). Since the spring module has the core module as a dependency, it is sufficient to only refer to the spring artifact of stepDP, since then core is automatically added to the project as well.
If you want, you can of course integrate both modules separately, but then you have to keep both versions up-to-date and compatible.
<dependencies>
    <dependency>
        <groupId>de.dfki.step</groupId>
        <artifactId>core</artifactId>
        <version>0.1.0-SNAPSHOT</version>
    </dependency>
    <dependency>
        <groupId>de.dfki.step</groupId>
        <artifactId>spring</artifactId>
        <version>0.1.0-SNAPSHOT</version>
    </dependency>
</dependencies>
Your pom.xml should look like this:
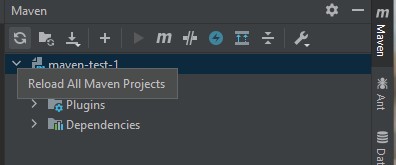
Finally, we need to re-import your Maven project. To do this, click on Maven in the top right corner and select "Reload All Maven Projects".
Now stepDP can be used in your project.
First Sample Application
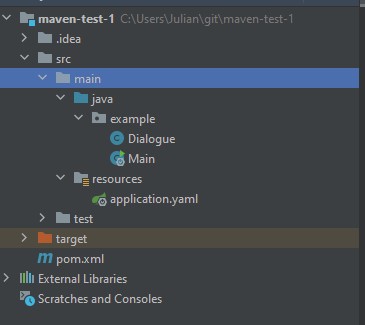
At the beginning we want to build a simple application that can greet us. For this purpose create the required files as shown in the screenshot:
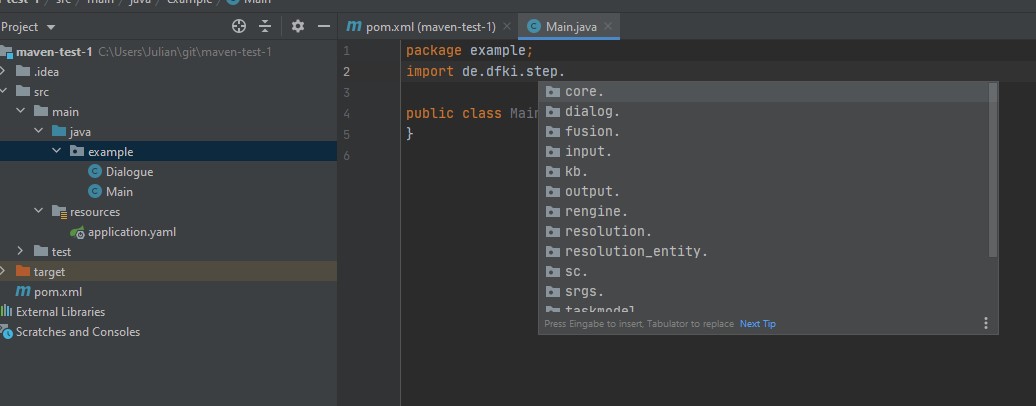
In the Main class you can also check if the integration of stepDP worked correctly by testing that the namespace de.dfki.step is importable.
If this is the case, you can add the start routine to this class:
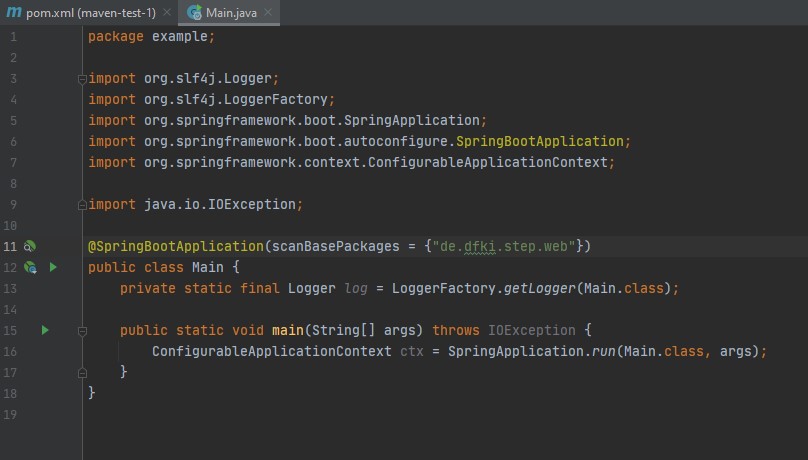
package example;

import org.slf4j.Logger;
import org.slf4j.LoggerFactory;
import org.springframework.boot.SpringApplication;
import org.springframework.boot.autoconfigure.SpringBootApplication;
import org.springframework.context.ConfigurableApplicationContext;

import java.io.IOException;

@SpringBootApplication(scanBasePackages = {"de.dfki.step.web"})
public class Main {
    private static final Logger log = LoggerFactory.getLogger(Main.class);

    public static void main(String[] args) throws IOException {
        ConfigurableApplicationContext ctx = SpringApplication.run(Main.class, args);
    }
}
stepDP is based on the Spring Framework. Therefore it must be initialized in the start class and the web interfaces must be configured accordingly.
Then we can already create our first dialogue. Edit your Dialogue class as follows:
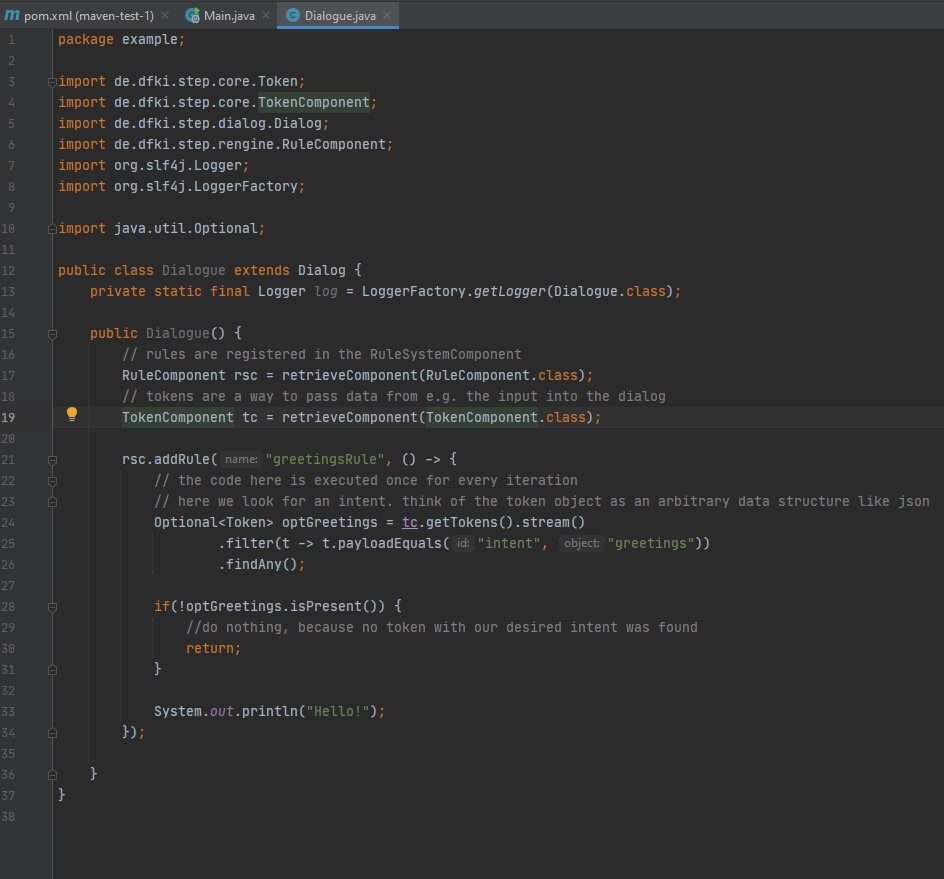
package example;

import de.dfki.step.core.Token;
import de.dfki.step.core.TokenComponent;
import de.dfki.step.dialog.Dialog;
import de.dfki.step.rengine.RuleComponent;
import org.slf4j.Logger;
import org.slf4j.LoggerFactory;

import java.util.Optional;

public class Dialogue extends Dialog {
    private static final Logger log = LoggerFactory.getLogger(Dialogue.class);

    public Dialogue() {
        // rules are registered in the RuleSystemComponent
        RuleComponent rsc = retrieveComponent(RuleComponent.class);
        // tokens are a way to pass data from e.g. the input into the dialog
        TokenComponent tc = retrieveComponent(TokenComponent.class);

        rsc.addRule("greetingsRule", () -> {
            // the code here is executed once for every iteration
            // here we look for an intent. think of the token object as an arbitrary data structure like json
            Optional<Token> optGreetings = tc.getTokens().stream()
                    .filter(t -> t.payloadEquals("intent", "greetings"))
                    .findAny();

            if(!optGreetings.isPresent()) {
                //do nothing, because no token with our desired intent was found
                return;
            }

            System.out.println("Hello!");
        });

    }
}
First we create the class and get the necessary components (rule and token). Then we create a rule greetingsRule, which processes a token with the intent greetings which returns a Hello!. More information about the different components can be found here in the documentation.
Then we still have to configure our application. To do this we edit application.yaml as follows
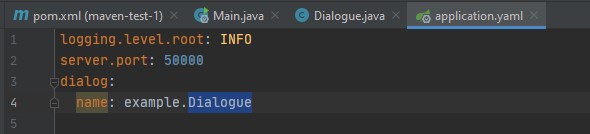
logging.level.root: INFO
server.port: 50000
dialog:
  name: example.Dialogue
Here we first define the debug level and the port of the web server. Then we determine which dialogue should be loaded.
Afterwards we can already start our stepDP project. To do this, we go to the Main Class and start our project from there.

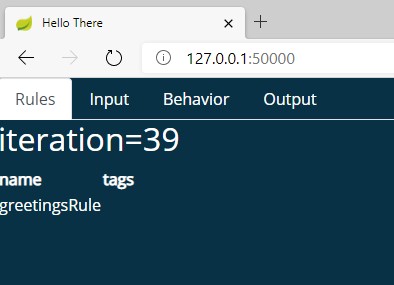
Web Interface
We can now open a web browser and go to the address http://127.0.0.1:50000 There you will find the WebGUI of stepDP. On the front page, you will see tha available rules and which rules are currently active.
To test our dialogue, we go to Input, insert the following JSON object and press sendIntent:
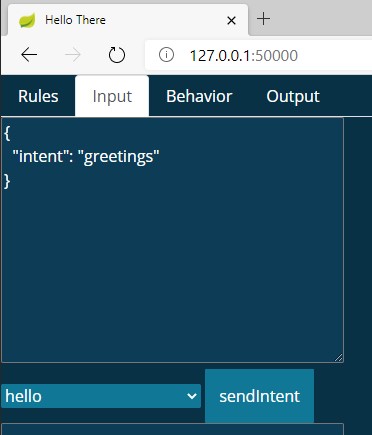
{
  "intent": "greetings"
}
After we have sent the intent, we can see the output of stepDP in our console.
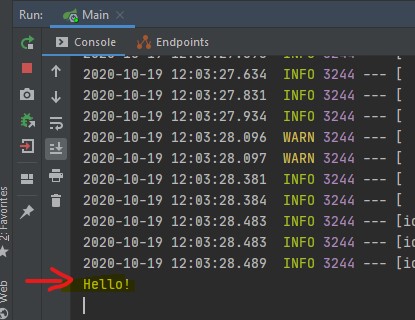
You have now created your first successful stepDP project and successfully fired the greetingsRule rule.